Are you using Outlook to its fullest potential? If not, you’re missing out on a valuable tool that will make your work so much easier. Not only will it incorporate everything you need to do with emails, like make appointments and set “Quick Steps,” it can save you a lot of time. We have 9 great timesavers we want to share with you here.
1. Turn Off Notifications
You know those little pop-ups that appear when you’re trying to concentrate on a project? They are there to let you know that you have new mail. This is great if you’re waiting for an important email. Otherwise, they can be very distracting.
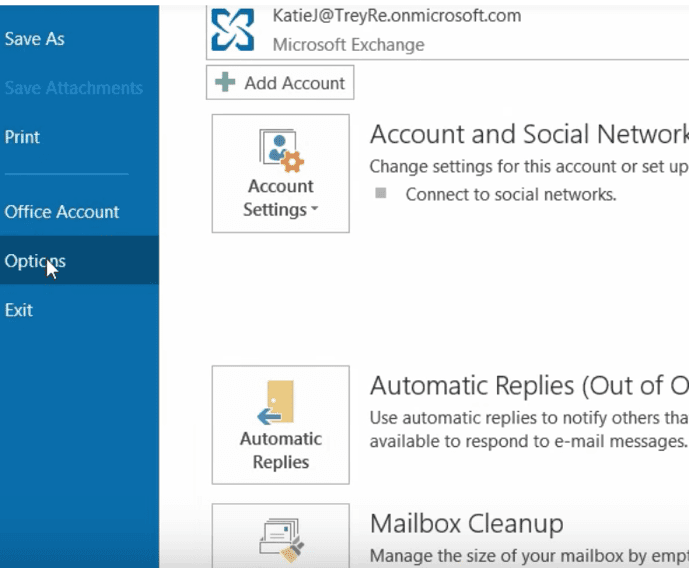
Here’s how to turn these off:

You can also do this right from Outlook:
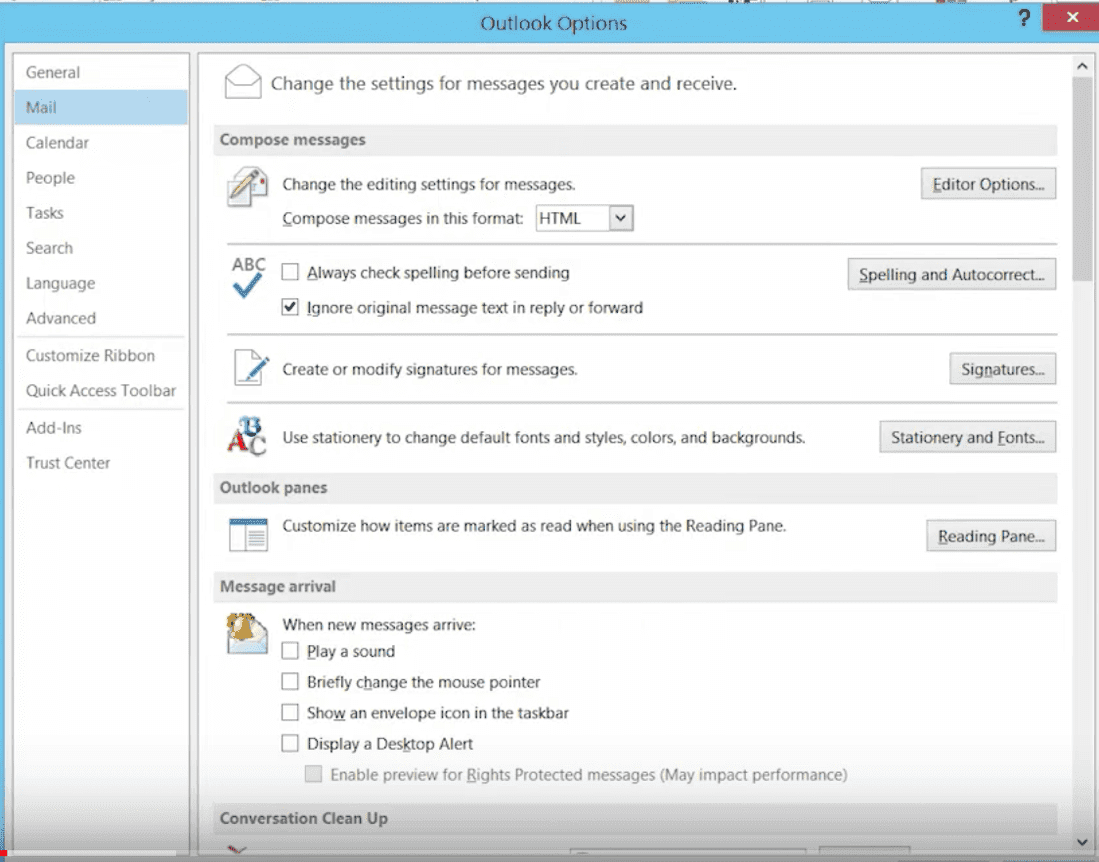
Under “Mail” you’ll see a bunch of options. Here’s where you can select all the notifications and sounds that simply distract you, and that you don’t need. Ah, peace and quiet for a change!
2. Drag Mail to the Calendar
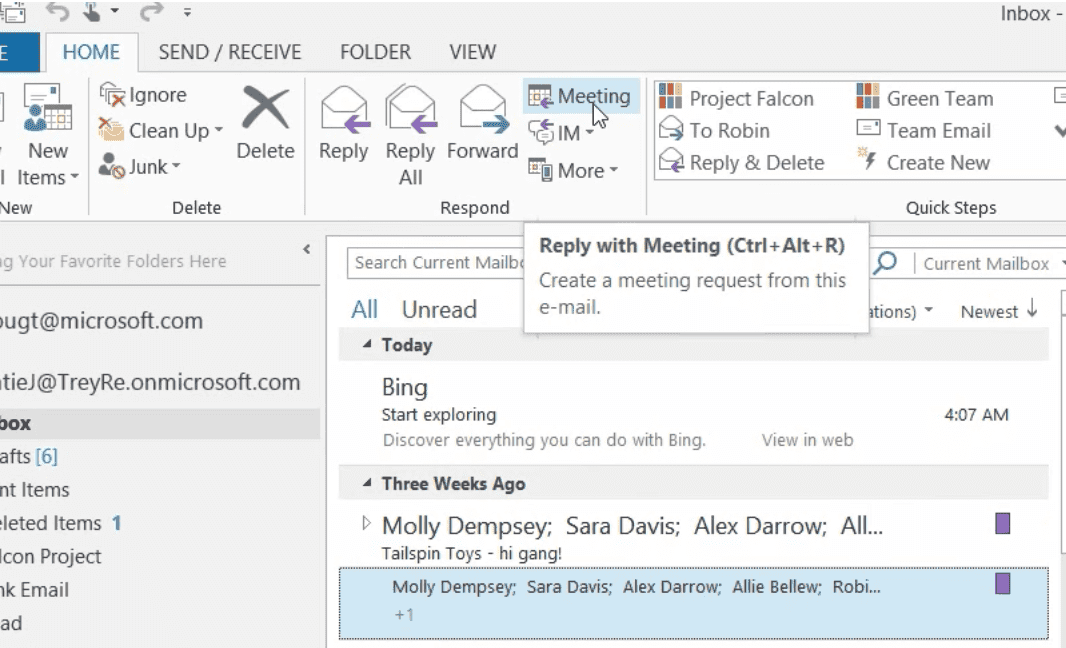
When you’re in an email, and you want to add a meeting to your calendar, simply go up to the top Ribbon where it says “Meeting” and you can “Reply with Meeting” to all the people on the email stream.
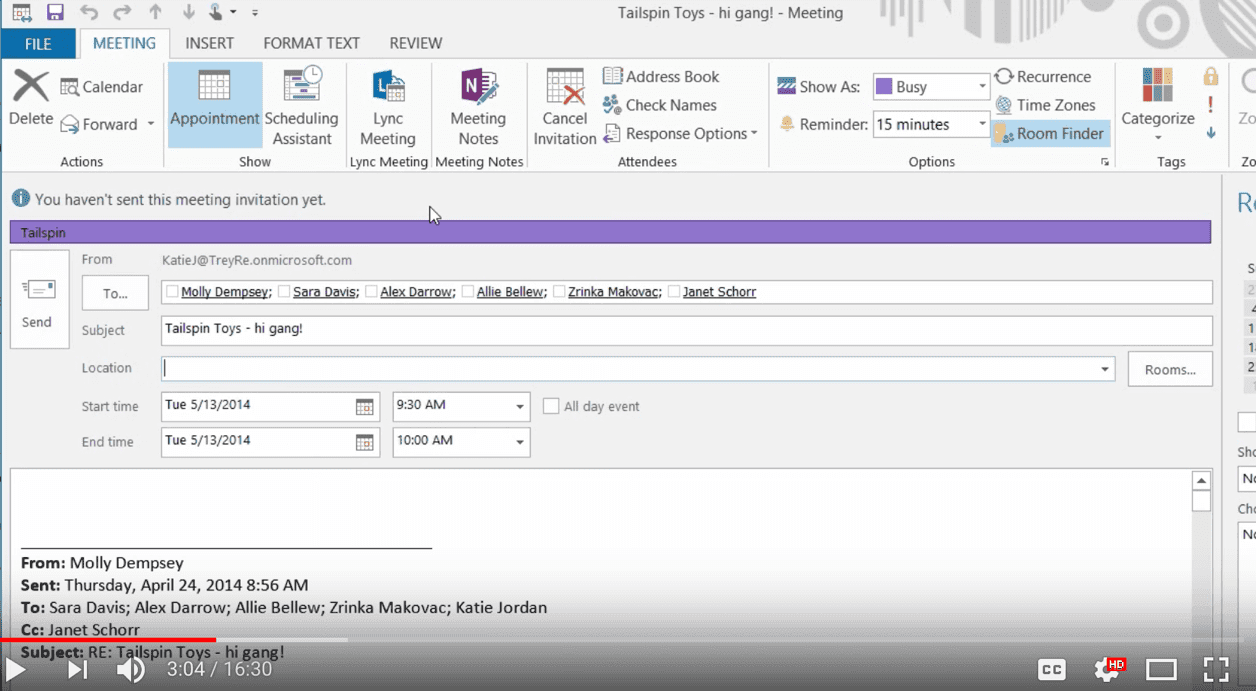
Set up the time and place, and then invite everyone.
3. Block Off Time Slots
Let’s say someone emailed you a proposal and you need to block off some time to read it. Here’s how to do this right from the email and attachment:
Here’s the email with the proposal marked in blue.
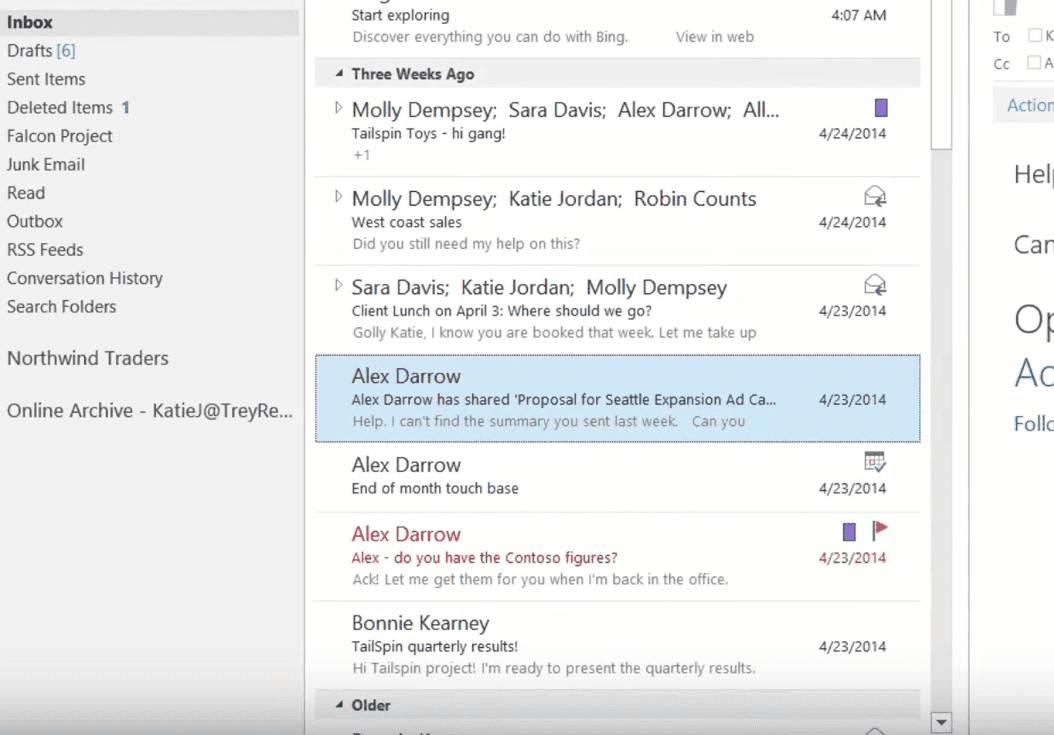
Drag the box down to the left where it says “CALENDAR” and it will create a prompt where you can enter the block of time in your calendar, on the day and time that works for you. It will appear as an appointment in your calendar.
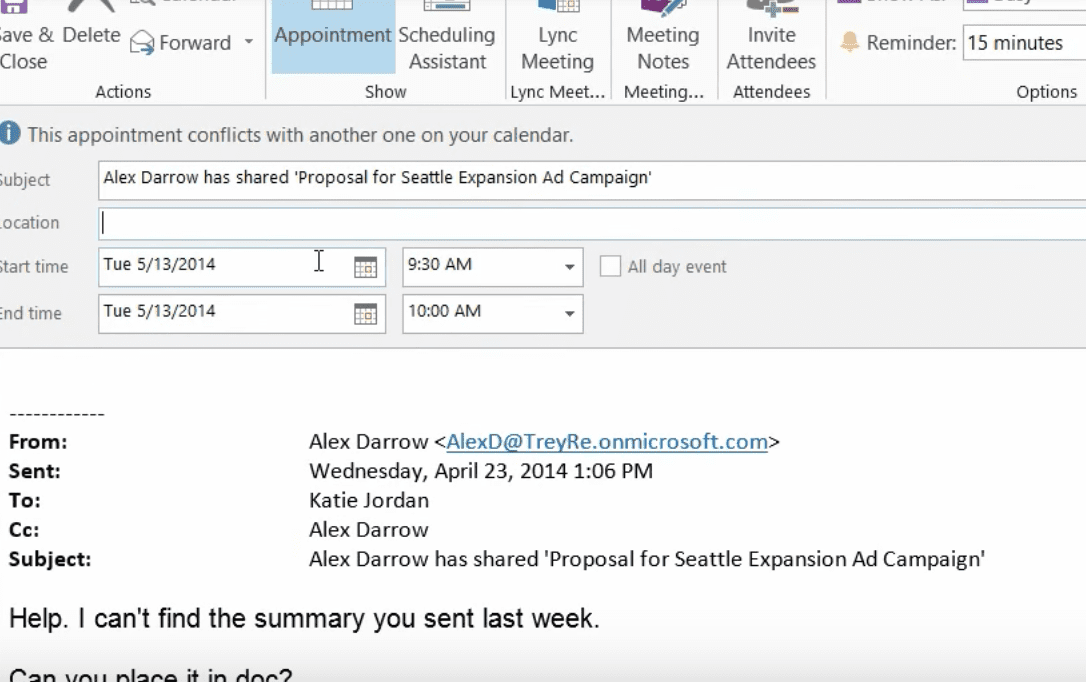
When you’re entering time in your meeting time slot, Outlook does some of the work for you.
Say you want to start at 10:00 am. Simply key in 10 and hit TAB, and Outlook will enter the rest (10:00 AM). You can even enter military time. 15:15 TAB and Outlook will convert it to 3:15PM.
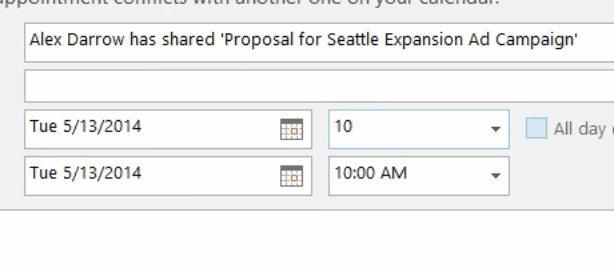
You can do the same with the end time as well.

4. The Ignore Button
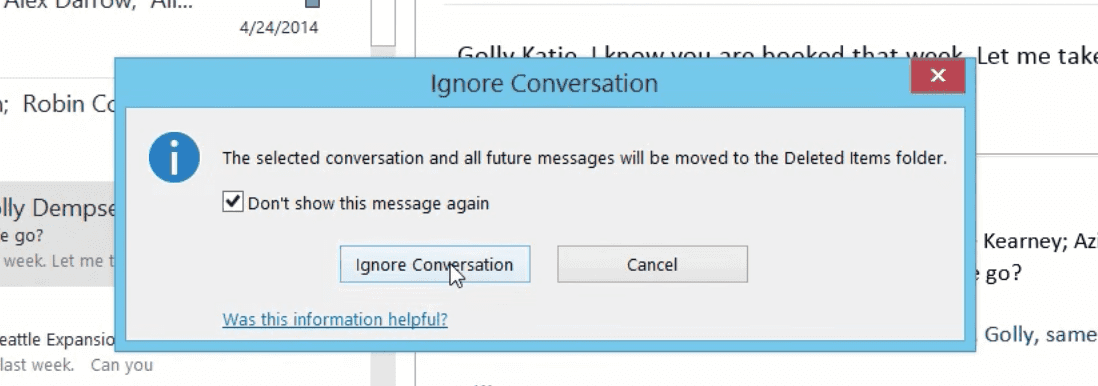
If there’s an email that keeps appearing in your inbox, but you don’t want to see it anymore, rather than deleting it you can simply go to the Ignore button on the top left, (or Control >Delete) and emails about this subject will automatically go into your Deleted Items.

You’ll get this prompt to ensure that you want to delete the message every time. Check “Don’t show this message again” and click “Ignore Conversation.” You won’t be bothered by the message anymore.
5. The Quick Access Toolbar
Microsoft provides this toolbar in all of their software solutions. You can put some of your most used commands in this toolbar. Simply check the ones that you want to appear. They will always appear at the top of your screen until you remove them.
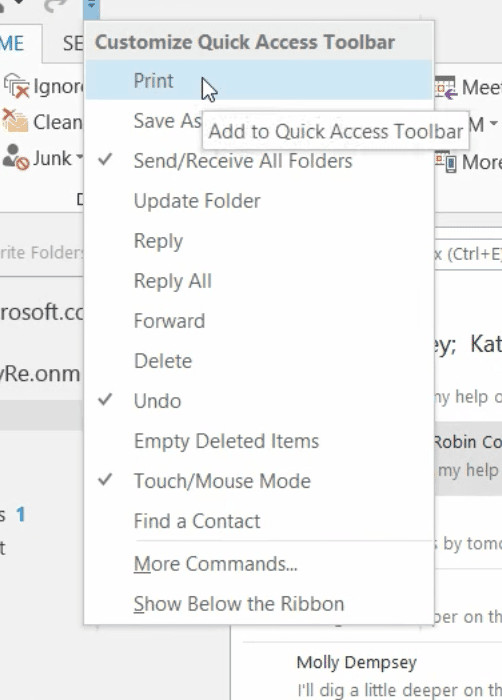
And you can easily add more commands, as you see below.
Simply highlight the commands to the left and click “Add” and they will appear in your ribbon. To remove, do the opposite. Highlight the commands to the right and click “Remove.”

5. Respond Fast with Instant Messaging
Sometimes you need a fast way to get a message to someone, and email isn’t doing this for you. Right from Outlook, go to the top ribbon to: “Reply All with IM”

Now, you can send everyone on your email stream an Instant Message instead of an email. This comes in handy if you need to get a quick message to your team. However, it only works if your team is connected to you with Microsoft Link. If not, you can do this with Skype as well.

6. Quick Steps
You may recognize this in the top Ribbon. It’s been in Microsoft products since 2010.

Sometimes you do things manually. Or you may set up Rules. For example, “If the email is from Molly Dempsey save it to Project Falcon.” Or something like this. You can also save commands like this in Quick Steps. Here’s one we set to move the message, mark it as read, tag it, and put a follow-up flag on it.

Quick Steps moved the email, categorized it and marked it as read, just as we specified.

There are multiple actions you can choose from in Quick Steps. Start with “Create New” and your selections will pop up. Click “New Message.” Then preset the email that you think you’ll use over and over.

Here’s a Quick Step to create an invoice right from Outlook.

Click the invoice you want (we have one called Tailspin already set up). Outlook will take you to your contact list where you can choose who to send it to.

Then we set the importance level as “High.”

And we simply fill in the information in the preset template, send it and it’s done!

7. Out of Office in Advance
Now you can set your “Out of Office” messages in advance. Remember when you had to do this right before you left town? No more.
Here’s how to set it up:
Go to the “File” menu.
Click ” Automatic Replies (Out of Office)
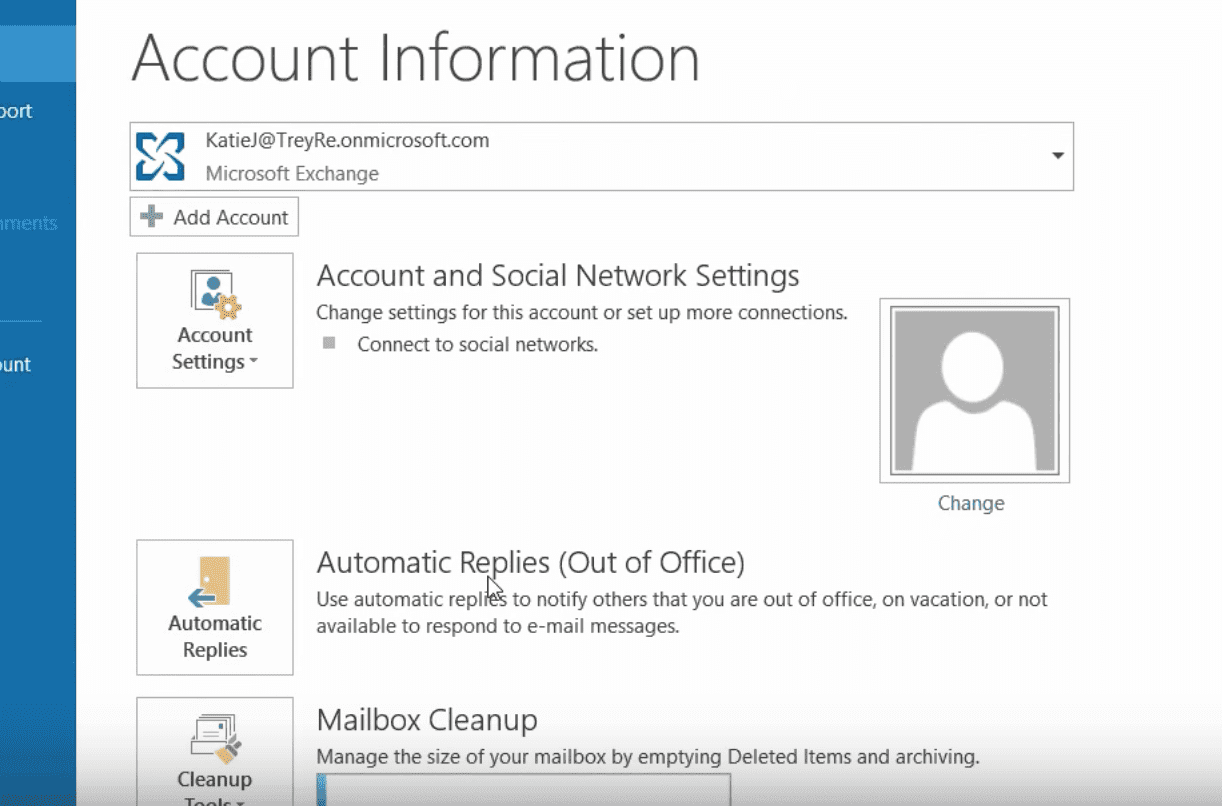
Then set up your parameters.
Click “Send Automatic Replies” and type in the start and end date, along with the message you want to send when you’re away.
Check the box that says, “Only send during this time range”. Outlook will remember to send the Out of Office message beginning on the date and time you set and stop on the end date and time.
You can also set Out of Office emails for those emailing you from inside or outside your organization. How easy is that?

8. Search Your Email
The search box is right above your emails.

Say we want to find messages from Garret Vargas. All I have to do is type “Garret” and his messages came up.

But as you can see, some other messages popped up here. They probably contain Garret’s name.
Yes, you can see below that Garret’s name was in Katie Jordan’s message. Outlook search capabilities go that deep into your emails. Outlook will even look in attachments in your emails for what you’re searching for.

You can also search the Current Mailbox or All Mailboxes.

And, notice that when you’re in Search you have all kinds of options in the top Ribbon.

9. Look for ? or press F1 for Help
The ? is on the top right of your screen if you ever need help in Outlook or any Microsoft program.

Or, simply click F1 and the Help prompt will appear.

Microsoft Outlook has many other great features. Keep watching this space for more ways to get the most from Outlook and other Microsoft products.
Call our business managed IT services department directly at (404) 777-0147 or simply fill out this form and we will get in touch with you to set up a getting-to-know-you introductory phone call.
Fill in our quick form
We'll schedule an introductory phone call
We'll take the time to listen and plan the next steps
11285 Elkins Rd Suite E1, Roswell, GA 30076
© Copyright 2024 Centerpoint IT. All Rights Reserved. Website in partnership with Tech Pro Marketing. | Privacy Policy
Get Immediate Help For All Your Technology Issues (404) 777-0147

If you want our team at Centerpoint IT to help you with all or any part of your business IT, cybersecurity, or telephone services, just book a call.
Fill in your information below to get started today.
"*" indicates required fields
Fill in your information below to schedule now.
"*" indicates required fields
Before your organization commits to 1, 2, 3 or even longer managed IT services contract, understand what you’re getting. Centerpoint IT gives you the facts in our Managed IT Services Buyer’s Guide.
Enter your information below and we’ll send it over.
"*" indicates required fields

We are turning 15 and want to celebrate this milestone with you because without you this would not have been possible. Throughout this year look for special promotions on services and tools aimed at Making IT Simple for You so you can focus on your business.

We are turning 15 and want to celebrate this milestone with you because without you this would not have been possible. Throughout this year look for special promotions on services and tools aimed at Making IT Simple for You so you can focus on your business.
https://calendly.com/centerpoint-it/discovery-call