Microsoft continues to add exciting features to Word with each new version that’s released. The “Track Changes” feature has been around since Word 2003, and it still works the same today as it did back then.
When creating a Word document there’s nothing extra you need to do. The Track Changes feature only comes into play when an editor, or customer, gets the first draft of a newly created document.
Here’s how to use Track Changes:
Begin by opening the document in Word.
Next, click on the “Review” Tab.

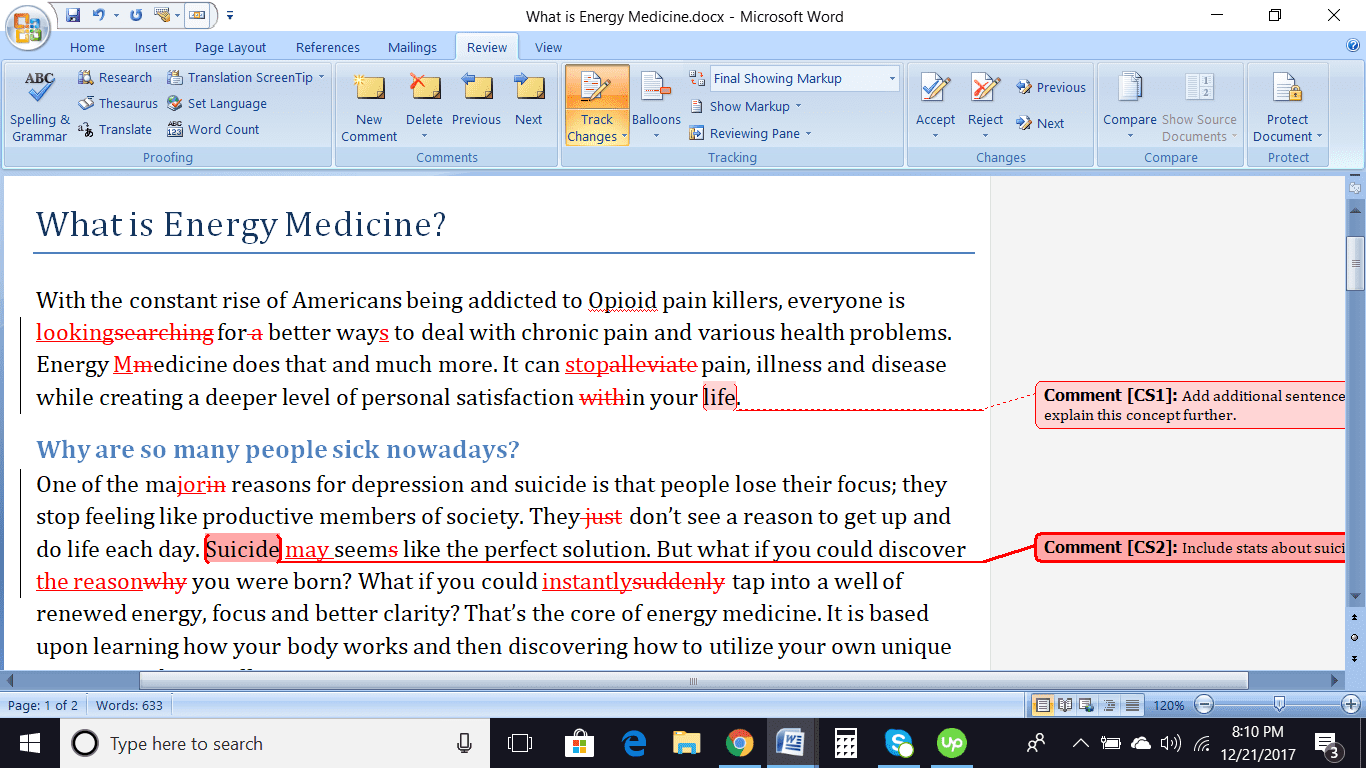
There are many helpful features under the Review Tab. The first section is called “Proofing.” This is where you can find the tools you need to write an article or essay. The Proofing section lets you check spelling and grammar, do research, or check the Thesaurus, and get the actual Word Count in a document. In many instances, it’s important to know the word or character count, especially for SEO (Search Engine Optimization) when writing content for information on the Internet.
The next section under the Review Tab is called “Language.” Here you can translate a document or choose a different language to write with. You might be more comfortable writing in Spanish or German. Or you may have been hired to write blogs for a French company. In any case, this is a handy tool to use when you write or edit in a different language.
The next section under the Review Tab is titled “Comments.” This is easy to use. However, there are a few things to be aware of. Be sure to place your cursor in the sentence at the exact place where you’d like to make your comment. Then click on “New Comment” and start typing. To delete a comment, simply right-click on the comment and choose “Delete” from the drop-down list.
Now “Tracking.” Under this section, you’ll find “Track Changes,” “Balloons,” “Final Showing Markup,” “Show Markup,” and the “Reviewing Pane.” By hovering over any of these, you can get more information about what they do.
Let’s take these, one at a time, and go over how to use them correctly:
Once you click on Track Changes, any typing you do in the document will be red and underlined. To stop Track Changes, simply click on it and your typing will return to normal. In most situations, you would not want to turn on the Track Changes feature while writing or creating your initial document. It should only come into play after you’ve completed the article and sent it to an editor or client for their review.
Once the editor gets the article for review, they will turn on “Track Changes.” This will allow them to go into the document and make changes that are readily visible to everyone.

Rename and resave the original article under a different name. The most commonly understood name would be something like: Revised1 or Revised plus the date. This makes it clear what version of the article you’re working on. It also makes finding different versions of a document much easier.
If several people are going to make edits to a document, then you should use the original name of the document plus the editor’s initials and the date. An article on Monarch Butterflies might look something like this:
When a document is edited several times by various people, it’s important to keep track of who did what, and on what date. This can eliminate sending the wrong version out to a client or editor.
An editor can choose from several options under Track Changes>Change Tracking Options. You can change the colors of insertions, deletions, and strikethroughs. There are also options for table-cell highlighting, formatting and balloons.
The third option available under Track Changes is “Change User Name.” This can be used to let everyone know who was responsible for a specific revision of a document.
The next feature in the “Tracking” group of commands is “Balloons.” There are three drop-downs available:
To the right of Balloons, there are three options available in the “Tracking” section. You can hover over each one to learn more about what it does. Below are the basic descriptions of each one:

To the right of Tracking is “Changes.” This is where you can accept or reject changes made to a document. If you trust the person who edited the document, you can save a lot of time by clicking on “Accept,” then going down to “Accept All Changes in Document.”

In just a moment’s time, you can accept every change that’s been suggested by all editors.
Please note that it’s important to proofread the document to make sure there are no wandering spaces or periods. It can be very difficult to get periods and spaces exactly right after a document has been edited several times.
If you don’t want to “Accept All Changes” at once, then you must go through the document one change at a time and decide whether to “accept” or “reject” the change. This can be painstakingly slow. However, some people want a better level of control over the final document. Therefore, they should take the time to do this. The “Previous” and “Next” commands let you move forward or backward when checking the corrections made.
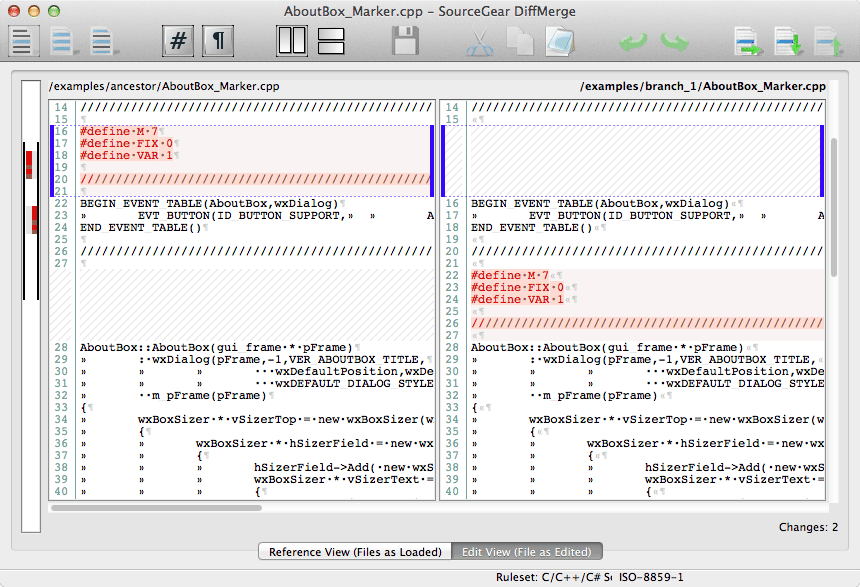
To the right of “Changes” you’ll find “Compare.” This section lets you compare or combine two different versions of the document. Unless you’re absolutely sure of what you are doing, this tool can make a mess out of your document—So, use it with caution!
For more information about “Track Changes” in Word, or questions about other Microsoft tools, contact Centerpoint IT at (404) 781-0200 or info@centerpointit.com. Leave the details to us, so you can concentrate on your business.

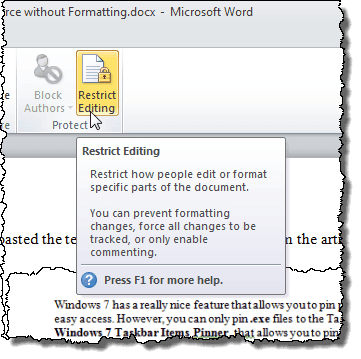
The next-to-last section in the Review tab is called “Protect.” If you’ve used Google Docs before, then you’ll easily understand how this feature works. In Google Docs, you can give another person access to a document. However, there are different levels of access, such as view, edit, etc.
You might want to prevent certain people from making changes to a document. To accomplish this in Word, click on “Protect Document>Restrict Formatting and Editing.” There are three options available to you:

The default for most documents is “unrestricted Access.” This allows anyone to make any type of change they deem necessary. If you click on “Restricted Access,” then a dialog box will open asking you to sign up for Microsoft’s “Information Rights Management Service.” Many companies have their own version of this. However, you can sign up and pay a monthly fee for this Microsoft service.
In a wide range of businesses, certain documents contain things that the company doesn’t want to be made public. This type of information can range from the recipe for Mrs. Smith’s Cookies, to an intelligence report generated by the FBI. Most companies won’t need to use this service, but it’s important to know what it is, and that it’s available through Microsoft.
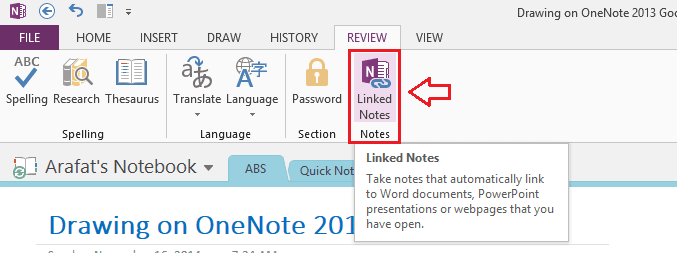
The very last section of the Review tab is called “Linked Notes.” It contains only one option, “OneNote.”.Linked Notes allows you to dock OneNote to either side of the computer screen. This is handy if you need to reference information found on various websites. It prevents you from having to look back and forth to take notes on a topic. In addition, your notes are automatically linked to whatever you are researching. This feature is available in Word 2010 and up, but not in Word 2007 and backward. It works with PowerPoint, Word, Internet Explorer and other OneNote pages.

Call our business managed IT services department directly at (404) 777-0147 or simply fill out this form and we will get in touch with you to set up a getting-to-know-you introductory phone call.
Fill in our quick form
We'll schedule an introductory phone call
We'll take the time to listen and plan the next steps
11285 Elkins Rd Suite E1, Roswell, GA 30076
© Copyright 2025 Centerpoint IT. All Rights Reserved. Website in partnership with Tech Pro Marketing. | Privacy Policy
Get Immediate Help For All Your Technology Issues (404) 777-0147

If you want our team at Centerpoint IT to help you with all or any part of your business IT, cybersecurity, or telephone services, just book a call.
Fill in your information below to get started today.
"*" indicates required fields
Fill in your information below to schedule now.
"*" indicates required fields
Before your organization commits to 1, 2, 3 or even longer managed IT services contract, understand what you’re getting. Centerpoint IT gives you the facts in our Managed IT Services Buyer’s Guide.
Enter your information below and we’ll send it over.
"*" indicates required fields

We are turning 15 and want to celebrate this milestone with you because without you this would not have been possible. Throughout this year look for special promotions on services and tools aimed at Making IT Simple for You so you can focus on your business.

We are turning 15 and want to celebrate this milestone with you because without you this would not have been possible. Throughout this year look for special promotions on services and tools aimed at Making IT Simple for You so you can focus on your business.
https://calendly.com/centerpoint-it/discovery-call
Notifications